CLICK HERE for my DL.ART Thankful Thursday challenge ending October 27
CLICK HERE for my DL.ART Linky Party ending October 31
Hi Friends,
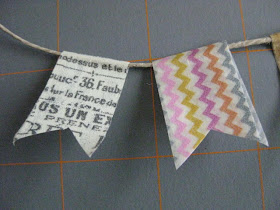
Here is a quick tip for you on making your own mini bunting, garland, banner or whatever you want to call it. I may have done a tutorial similar to this but, this might even be easier, if you happen to have washi tape.
What you will need 8-10 inches of hemp, cord twine crochet thread, what ever you have available.
Then, decide what tapes you want to use, put them in the order you would like them to be added to the hemp.
Fold them over 1 at a time so it sticks the the hemp, trim the bottom to form an upside down V or what ever shape you want.
When you lift the tape be gentle as to not rip it.
You are not ready to use your banner on your card
You will be seeing this on my card Saturday.com back and check it out.
You can also see this tip and many others over at Creative Cutter Room
Thank you for stopping by,
I hope you enjoyed this tip I hope you will use it and I hope you will have a blessed day,
Diana


What a great tutorial. Thanks for sharing.
ReplyDeleteHugs Nana
♥ My Crafting Channel ♥
Email Me
Great tutorial and I love the Washi tape you combined :)
ReplyDeleteReally neat idea! I put it on toothpicks but not a cord! Thanks for sharing!
ReplyDeleteYou have so many cool ideas. I am going to try this have a fun evening
ReplyDeleteWhat a cute idea! TFS!
ReplyDeleteGreat tip Diana! This really makes banner making so easy! Carri~Abusybee
ReplyDeleteDiana, this is so cute! What a great little tutorial! :) Thanks so much for stopping by my blog. It is so good to hear from you/see you again. :) Thank you for your kind words and I can't wait to become more active again in this wonderful scrapping community.
ReplyDeleteXO ~ Amy Jo
http://lv2scrapandfibrofacts.blogpsot.com
amyjrockstar at gmail dot com
Oh, this is so easy...and so darn cute! I have got to use this technique!
ReplyDeleteAwesome tutorial!! And what a fabulous banner!!
ReplyDeleteLisa
A Mermaid's Crafts